How to Cure UV Resin Quickly and Properly?
Curing UV resin well is not simply a matter of shining a lamp on it. The resin, lamp wavelength, layer thickness, and exposure time must work together. A clear pendant may harden quickly at the surface while remaining soft underneath. That hidden softness can cause bending, tackiness, or disappointing results later. Small details matter.
Reinhold Schwalm, author of UV Coatings: Basics, Recent Developments and New Applications, offers a useful foundation for understanding UV-curing materials. A concise paraphrase of that expertise is: “Match the curing light to the resin, and verify that the entire layer has hardened.” This is not a verbatim quotation. For makers, it points to practical checks: follow the resin maker’s instructions, confirm the lamp’s wavelength, and avoid assuming that a longer exposure always fixes poor compatibility. Thin, even pours usually cure more predictably than deep pools. Shadows and opaque pigments can block light.
There is no universal timer. Resin formulas and lamps vary, and even a familiar project can behave differently in a cool room. Slightly frustrating, but true. This guide explains how to Cure Uv Resin quickly without sacrificing a reliable finish. It will cover lamp setup, layer depth, positioning, and simple ways to check the cure. Wear suitable gloves and eye protection, and work with good ventilation. If a piece still feels tacky, pause and investigate rather than covering the problem with another layer.
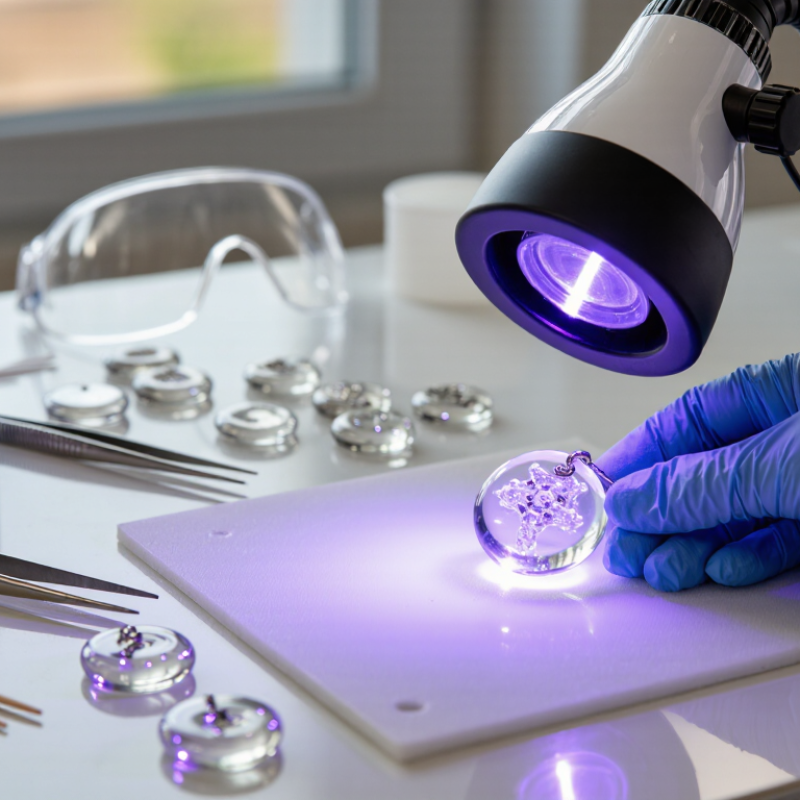
Understand How UV Resin Cures
UV resin does not harden simply because it feels warm. Light activates a photoinitiator, which starts reactions that link small molecules into a solid polymer network. The lamp must emit wavelengths the resin can absorb. ISO 21348:2007 defines UV-A as 315–400 nanometres, a useful range to check against a resin’s technical sheet. Wavelength match matters.
Curing also depends on light intensity, exposure time, layer thickness, and pigments. A bright lamp cannot reliably cure through an opaque charm or a deep pour. Light may harden the surface while leaving a soft center. Try thin layers, and rotate or illuminate both sides when the design allows. Keep the lamp at the distance specified for the resin; moving it farther away can reduce the light reaching the surface.
I still find one detail easy to underestimate: oxygen can interfere with curing at the exposed surface, leaving a tacky feel. That does not always mean the whole piece is uncured. Check the product’s instructions and test a small sample before making a thick casting. Let the resin cool between exposures if it becomes noticeably warm. More light is not always better. A measured cure beats guesswork.
How distance affects UV curing
This chart shows relative UV intensity predicted by the inverse-square law for an ideal point-source lamp, normalized to 100% at 5 cm. Greater distance means less intensity at the resin surface, which can slow curing. Actual results depend on the lamp, resin, wavelength, and layer thickness; follow the resin maker’s curing instructions.
Prepare the Resin and Workspace
Before curing, let the bottle reach room temperature and roll it gently between your palms. Shaking can trap bubbles. Wipe the work surface, mixing stick, and mold with a lint-free cloth, then keep dust and sunlight away. A stray window beam can start curing resin before you are ready. Wear suitable gloves and eye protection, and check the product’s safety instructions. Small habits matter here.
Pour only what you can spread in a thin, even layer. Thick pours may cure unevenly, leaving a tacky surface or soft interior. Check the resin’s recommended wavelength, then match it to the lamp; a lamp’s advertised wattage alone does not confirm adequate curing. Keep the lamp at the stated distance, and avoid guessing the exposure time. ACGIH’s 2024 Threshold Limit Values and Biological Exposure Indices set an effective UV exposure limit of 3 mJ/cm² over an eight-hour workday. That is a worker-exposure guideline, not a resin-curing target, but it supports shielding skin and eyes. I still find workspace prep easy to rush; checking the lamp distance twice is a worthwhile habit.
Apply the Resin in Thin, Even Layers
How to Cure UV Resin Quickly and Properly?
Apply the Resin in Thin, Even Layers
A thin layer lets UV light reach more of the resin, helping it cure evenly. Pour slowly, then guide the resin into place with a silicone tool or toothpick. Aim for a smooth coat without puddles at corners. Thick spots may feel firm on top while staying soft underneath. That part is easy to miss.
Tips: Follow the resin’s label for layer thickness and curing time. Keep the lamp at the recommended distance, and rotate the piece if its shape creates shadows. A quick test on a small area can reveal whether the light reaches the whole surface.
Let each layer cure before adding the next. Check the surface and edges, not just the center. If a spot remains tacky, give it more exposure as directed, or check for shadows, residue, or an unsuitable lamp. More light is not always the fix; I would reconsider the layer thickness first. Work in a clean, ventilated area, and avoid touching uncured resin. A little unevenness may still show, especially around tiny details. Adjusting the next layer is often more reliable than trying to hide it with one thick coat.
Choose the Right UV Light and Curing Time
Choosing the right UV light matters more than choosing the brightest lamp. Check the resin’s instructions for its compatible wavelength; many formulations work around 365–405 nm, but this range is not universal. A mismatch can leave the surface soft, even under a powerful light. That detail matters. Keep the lamp close enough for even exposure, while following its safety guidance. A small test drop on a clear scrap piece can reveal whether the light and resin work well together.
Curing time depends on the lamp, resin depth, color, and distance. Start with the maker’s recommended time, then inspect the piece before adding more exposure. Thin, transparent layers often cure faster than thick or heavily pigmented ones. Turn the piece to expose hidden edges, and cure both sides when needed. Still tacky? Add short intervals rather than guessing with one long session. It is tempting to treat a timer as proof, but it only measures exposure—not whether light reached every spot. I would also check a test piece after it cools; a rushed inspection can be misleading. Wear suitable eye protection, avoid looking directly at the lamp, and keep skin out of its beam.
How to Cure UV Resin Quickly and Properly? - Choose the Right UV Light and Curing Time | Project or layer | Suggested layer thickness | Light selection | Starting cure-time estimate | How to check the cure |
| Thin coating or small, clear detail | About 0.5–1 mm | Use a UV-A lamp within the resin’s specified wavelength range, commonly 365–405 nm. | About 1–3 minutes; inspect and add short intervals if needed. | The surface should feel firm rather than liquid or tacky. Check the underside too. |
| Small charm or shallow mold pour | About 1–2 mm per layer | Match the lamp wavelength to the resin instructions; place the lamp close enough for even exposure without overheating the piece. | About 2–5 minutes per side as a starting estimate. | Turn the piece over when possible and cure both sides. Look for soft or uncured areas. |
| Colored, opaque, or glitter-filled layer | Keep layers thin, around 1 mm or less when light transmission is limited. | Use the resin-compatible UV-A lamp. Pigment and glitter can block or scatter light. | Cure in thin layers; allow about 2–5 minutes per layer, then reassess. | Do not assume a hard surface means the center is cured. Avoid thick, heavily pigmented pours. |
| Deep or bulky casting | Not recommended as one thick pour unless the resin is specifically designed for it. | A surface lamp may not deliver enough UV to the center of a deep or opaque casting. | No reliable single cure time; build up with thin layers and follow the product’s instructions. | If the interior remains soft or liquid, the piece is not fully cured. Use a resin intended for deep casting instead. |
| Final surface cure | Apply a thin, even top layer if the project calls for one. | Use the specified wavelength and expose the whole surface evenly; rotate the piece if needed. | Start with 1–3 minutes, then inspect and extend in short intervals if necessary. | A surface can remain slightly tacky depending on the resin and curing conditions. Follow its stated finishing or post-cure guidance. |
Important: Cure times are starting estimates, not guarantees. Resin formulation, wavelength, lamp output, distance, layer thickness, color, and temperature all affect curing. Follow the resin manufacturer’s instructions, work in a ventilated area, and protect skin and eyes from uncured resin and UV light.
Check the Cure and Fix Common Problems
After curing, check more than the surface. A piece may feel firm while resin underneath remains soft. Look for sticky patches, cloudy areas, or a bend that should not be there. Do not test uncured resin with bare fingers. Wear suitable gloves, and follow the resin maker’s safety instructions. A quick visual check matters.
If the surface stays tacky, confirm that your lamp matches the resin’s specified light wavelength. Move the lamp closer only as directed, and give the piece more exposure in short intervals. Turn it over when possible so both sides receive light. Thick pours are a common culprit; light may not reach the center. I used to assume that extra curing time fixed every problem. It doesn’t. Some resin needs thinner layers or a different setup.
Cloudiness can come from trapped bubbles, moisture, or uneven curing. Let the piece cool between longer exposures, since heat can warp delicate work. For a deep or opaque casting, inspect an inconspicuous area and check the product’s depth limits. If it remains soft inside, don’t sand or handle it as finished. Separate the uncured material safely, improve the setup, and make a small test pour. Small tests are less frustrating.